Posts

Episode I: Clash of the Noobs

Image
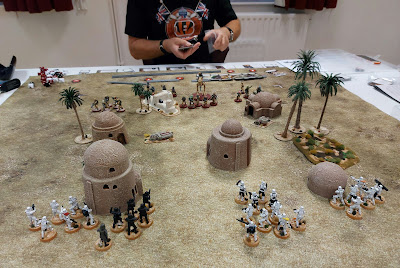
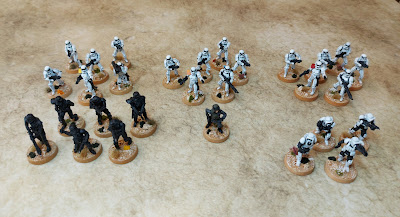
The Bristol Biguns Star Wars Legion campaign is up and running! Organised by David Clark (thank you), there are a group of us who keen to get gaming in the Star Wars universe. I’m a relative newcomer to this game and Rob even more so, hence the title. The first game is a 500 point skirmish. I have Galactic Empire led by General Veers whilst Rob has Rebels led by Luke Skywalker. The view from my side, Stormtroopers, Death Troopers and some Scouts. Thanks to Paul for valuable assistance with getting the list together. Rob has pushed one rebel squad far forward in the centre supported by an AT-RT with Luke not far behind. During the first turn I concentrated the bulk of my shooting on the rebel walker and very nearly destroyed it, before blasting it to pieces at the start of turn two. Luke suffered a similar fate during turns two and three … it’s tough to deflect HH-12 shells with a light sabre. To be fair, Rob’s dice rolling, especially with the white D6 armour dice, was terrible! The mi...

More ACW Extras

Image
A little more painting for my ACW forces. A pair of pack horses and a handler for the Union army. Two more casualty/shock markers for each side. Can’t have too many! Horses by Redoubt and men by Dixon. Thanks for looking!

Galactic Empire Starter Force

Image
My initial force for Star Wars Legion, 500 points of Galactic Empire, is ready to rock! Figures painted using a slightly simplified version of the methods described by the excellent YouTuber Sorastro. Next up will be either a similar sized Rebel force, or perhaps some additions to this force such as Vader, a squad of 74-Z speeder bikes, a scout sniper team or an AT-ST? All primed and ready to go.

Mini Mos Eisley

Image
These buildings are ready to use straight from the box. However I do intend to jazz them up a bit with some weathering, foliage and so on. But they’ll do for now whilst I focus on getting figures painted. They’re from the “Battlefield in a Box” range, more specifically Galactic Warzones, and are often available from bigger retailers like Firestorm Games or Goblin Gaming, etc. There’s also a huge range of stuff available via Etsy but some can be very expensive. I got these buildings at a bargain price.

Star Wars Terrain

Image
This interestingly shaped piece of cardboard packaging was lurking in my recycling so, along with a few bits of leftover tank kits, I made it in to a sort of power generator ‘thingy’.  The structure is Americana Honey Brown, then Tan followed by Bleached Sand. The base is Americana Honey Brown, VMC Tan Yellow, VMC Dark Sand, Foundry Boneyard light. Then a selection of tufts and clump foliage from Gamers Grass, Warlord and Woodland Scenics. Next are a few resin items from TT Combat. The recipe here was simply VMC Stone Grey and Foundry Conker Brown washed with GW Agrax Earthshade. Then highlights of the base colours followed by GW Mephiston Red. I have a few more resin items on the go including some buildings that are rather “Mos Eisley” in style.

First Star Wars Figures

Image
A quick post to show the first of my Stormtroopers for Star Wars Legion. The recipe is basically a simplified version of the truly excellent tutorial by Sorastro, you can find it  here . Plenty more figures to follow. Chum David Clark has organised a Bristol based campaign/league (thanks mate!) which will kick off in September so we’ve all got plenty of time to get our forces battle ready. 

More Orks and Da Rusty Junk

Image
I felt like painting something a bit different recently so dug out these Ork Nob figures. I may give the red another highlight of GW Wazdakka Red as it’s a bit intense but it’ll do for now. I’ve also been experimenting with some rust recipes (mainly from Mr Scrivs blog) and these are two test pieces. I’ve slightly over done the rusting as I wanted to try it out on larger areas and I’m quite pleased with it. Grey primer and a coat of GW Leadbelcher (or Black primer and heavy drybrush) followed by a wash of GW Agrax. Then apply large patches of any a dark reddish brown such as Foundry Conker Shade or VMC Flat Brown. Then add highlights of the base with increasing amounts of orange and yellow. Try to leave a good range of colours from base to highest highlights. Then go back with a bit of wash here and there and perhaps some Leadbelcher on any freshly scraped edges.